The most delicate part of any vehicle’s audio system is the speaker. They’re the most crucial component of any audio system and can be quite annoying, especially when blown.
Therefore…
Knowing how to test car speakers is mandatory, especially for folks who don’t like the idea of paying the mechanic for a simple procedure. After all, the issue might not be the sound system; it may be loose connections or a lack of continuity for wires.
How To Test Car Speakers?
Just because your car’s speakers are not working or producing a rattling sound, it doesn’t mean they are blown. Therefore, before you even assume that your speakers are damaged, you should try and troubleshoot the problem. For more details on how to test car speakers and improve the sound quality of your entertainment system, please read on…
1. Test The Speaker Wires
Before assuming that the speakers are damaged, you can try and check the wires for continuity and lost connections. Doing this will save you a lot of time in the long run; after all, you won’t have to go back and examine the wires after repairing the car’s audio systems. Therefore, make sure you have a functioning digital multimeter or analog voltmeter.
When testing the speaker wires, you should do the following:
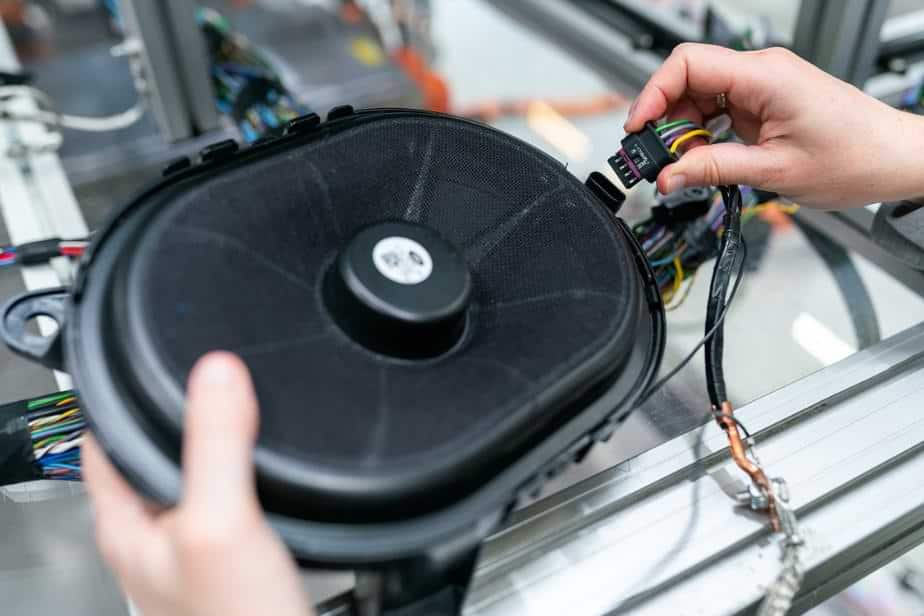
Detach The Wires From The Vehicle’s Speaker Box
To detach the wire, you should try one of the following methods:
- Twist the connectors clockwise, and the wires will be released.
- You can also push the negative and positive clips, and the wires will be detached.
The right method for detaching the wires will depend on your speaker and car model.
Separate The Wires From The Receiver Or Amplifier And Create A Circuit
You can achieve this by using the above methods; you can twist the two connectors or press on the clips. Again the technique you use will depend on your car model. The connectors to the receiver and amplifier are found on the rear part of these units.
After detaching the wires from the receiver, amplifier, and speakers, you can create a closed circuit that you will use to check them for continuity.
Prepare The Multimeter Or Voltmeter
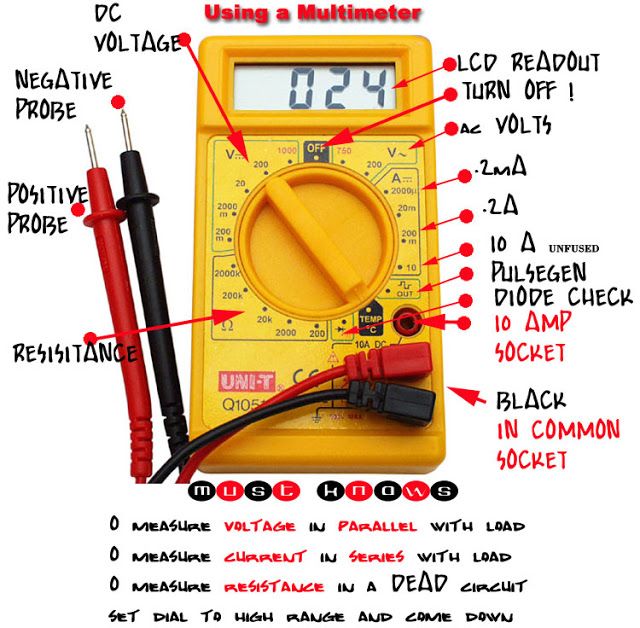
If you’re using the multimeter, you can skip this step; after all, you don’t have to calibrate it. But if you’re planning on using a voltmeter, you should first switch it on and pick the ohms settings ideal for assessing the resistance of the wire by simply placing its selector on the Ohms position.
Scale The Voltmeter Or Multimeter
You must ensure that your voltmeter and/or multimeter aren’t faulty. To scale your device, you should usher the red and black leads together.
If the voltmeter is functioning properly, you should get 0 ohms reading on your voltmeter, but if you get any other reading, it is faulty.
Test The Wires
Once everything is ready, you can test the wires by nudging the black and red probes of the voltmeter/multimeter onto your circuit’s open ends.
If the wires are okay, the circuit should display some resistance levels, but if damaged, they show infinite resistance levels.
A damaged wire will display “OL” or even produce a constant sound when using a multimeter. If the wires are damaged, you can replace them or repair them.
2. Examine The Amplifier For Damages
The issue may not be the speaker but the broken amplifier. Remember, a damaged amplifier produces a distorted sound normally blamed on the speaker. Therefore, to check the speakers for damages, you should do the following:
- Examine the fuse box and fuse: Removing the fuse from the box and placing the black lead on one of the poles and the red on the other. If the fuse is faulty, it will produce no beeping sound, but if it’s okay, it should produce beeping noises.
- Examine the capacitor: set the device to the testing capacitance and then connect to the multimeter positive and negative leads to their respective capacitor terminals. The reading you get on your device should match the capacitor’s ratings.
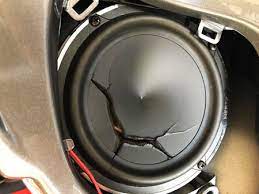
3. Physically Examine The Speakers
Before you even start testing any part of the speakers, you should examine it for any visible damages, which include broken components, wobbly cones, and loose wires. You can even touch the cables and look for visible cuts.
4. Listen To The Sound Output
You can also determine if the speaker is faulty by listening to your favorite music at an optimal volume. If the output lacks range, then the speaker needs proper equalization. Ensure the song you’re listening to features an electronic bass and bass drum that a spoiled speaker can easily distort.
On the other hand, rattling and crackling noises signify distortion, while muffled sounds are signs of a blown speaker.
When you notice these symptoms, you should isolate the speakers and determine which ones are damaged.
5. Test The Speaker Using A Battery
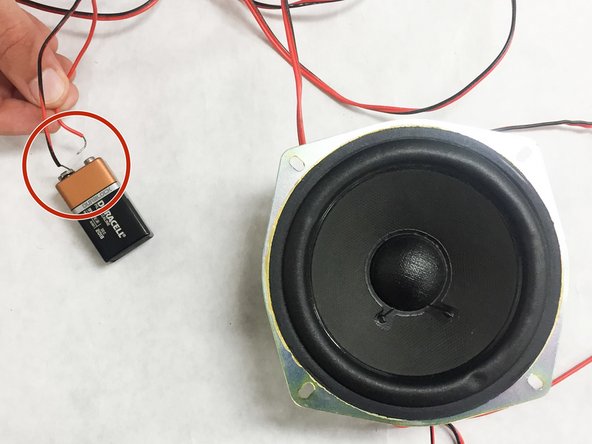
For this test, you must remove the speaker cover, unmount it, and then test it using a battery. Simply connect your speaker terminals to a 12-volt and 9-volt battery. The negative battery terminals should be on the negative lead and vice versa. If a pulse is generated, then the speaker is still functioning.
When using the battery, you should hear a popping sound indicating that the speaker is working correctly, but if it’s damaged, you will not hear any sound.
6. Test The Speaker Using A Multimeter
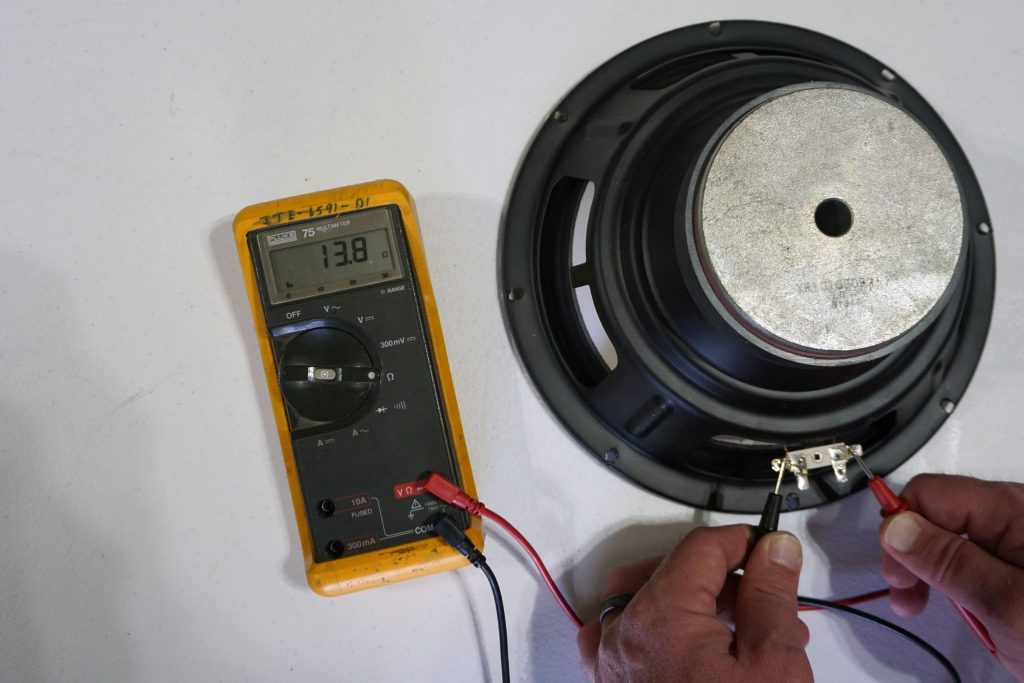
Examine the speaker and look for parts of the wire where you can fasten and place your multimeter. If you get a reading of 1 ohm, the speaker works perfectly, but if it’s damaged, you will get an infinite reading.
Pro Auto Thought: Your car speakers need cleaning, too! Sometimes dusting them will resolve your issues with them (hopefully)! Here is our post to help you out — How To Clean Speakers.
Common Car Speaker Problems
When testing your speakers, you are doing it for two reasons. You’re either planning on purchasing a new speaker or diagnosing a problem. So here are some of the most common issues that can damage your speaker:
1. Blown Speakers
A blown speaker can affect your listening experience and make it almost impossible for you to enjoy your favorite music. And in some cases, the speaker may not even function, but with the right technique, you can determine the cause of the problem in no time.
2. Disconnected Speakers
This problem is the outcome of wear and tear. It can happen when the cables, wires, and internal components of the speaker loosen. Some of the signs of disconnected speakers include:
- Speaker may feel a glitch
- The audio keeps shutting off
- Unable to produce sound
Watch This!
Frequently Asked Questions
How Can I Test If My Car Speakers Are Working?
The best method for testing your speakers is the battery test. All you have to do is connect your speakers to the speaker’s lead terminals, and if they generate a pulse, then they are functioning properly.
How Can You Tell If Your Speakers Are Blown Using A Multimeter?
Connect the multimeter’s probes to the speakers’ terminals and check the impedance reading. Blown speakers tend to give an infinite reading, while a perfectly functioning speaker will give a 1-ohm reading. But first, you must learn how to use a multimeter.
Why Are My Car Audio Systems Crackling?
Wire continuity issues almost always trigger the crackling sound. A bad wire between the speakers and amplifier can cause the speaker to start producing crackling noises.
Conclusion
Nothing is more disturbing than driving a car with a spoiled speaker producing crackling noises. It can be even more annoying if you don’t know the root of the problem and are working with a tight budget. Fortunately, you can troubleshoot the problem at home and find out the cause; after all, the problem is not always spoiled speakers.